Key Takeaways
- Warehouse layout directly impacts safety, throughput, and cost per pick — poor design causes congestion, double-handling, and accidents
- HSE requires strict pedestrian/vehicle segregation; HSG76 is the definitive guide for UK warehouse safety compliance
- U-flow, I-flow, and L-flow patterns each suit different site constraints and throughput profiles
- ABC slotting places fast-moving items closest to dispatch, reducing travel time by up to 40%
- Aisle width choices (wide, narrow, very narrow) trade accessibility against storage density — VNA can increase capacity by 40-50%
Why Warehouse Layout Matters
A warehouse is not a storage facility — it is a flow system. Goods enter, they move through value-add processes, and they leave. Every metre travelled, every lift performed, and every decision point crossed adds cost without adding value. Poor layout design compounds these costs: congestion slows vehicle movements, inadequate marshalling areas cause dock bottlenecks, and unsafe pedestrian/vehicle mixing leads to accidents.
According to the Health and Safety Executive (HSE), the storage, warehousing and road haulage industries reported over 8,500 work-related accidents in 2009/10, with almost 1,600 classified as major injuries including fractures and amputations. Manual handling remains the primary cause: lifting and moving by hand accounted for 278 major and 3,639 over-3-day injuries in freight-by-road operations during 2006/07, with bad backs the most common injury type. For a complete overview of current safety requirements, see UK Warehouse Safety Regulations 2026.
The cost of poor layout extends beyond safety. Double-handling — moving the same goods twice because storage locations are poorly planned — can add 15-25% to labour costs. Congestion at docks or picking faces reduces throughput during peak periods. Inadequate space for returns processing or value-add services forces operators to rent overflow space or turn away business.
Good warehouse layout design balances three competing priorities: safety (HSE compliance), efficiency (throughput and cost per pick), and flexibility (ability to handle seasonal peaks or SKU range changes). This guide covers the principles, patterns, and numbers you need to design or audit a warehouse layout that works.
The Core Principles of Warehouse Layout
Flow Patterns: Design for Movement, Not Storage
The first decision in warehouse layout is the flow pattern — how goods move from receipt to dispatch. There are three standard patterns, each with distinct advantages:
U-flow (most common in UK SME warehouses)
Goods-in and goods-out are on the same side of the building. Receiving docks and dispatch docks share the same elevation, often with receiving at one end and dispatch at the other. This pattern maximises dock flexibility — any dock door can serve either function depending on daily volume. It works well for smaller sites where the same team handles both receiving and dispatch, and where cross-docking is minimal.
I-flow or Through-flow (best for high-volume operations)
Goods enter one end of the building and exit the opposite end. This creates a straight-line flow with minimal backtracking. I-flow minimises congestion because inbound and outbound traffic never cross. It is ideal for high-volume cross-dock operations, cold-chain facilities where temperature control requires rapid throughput, and distribution centres serving retail networks with predictable demand patterns. The trade-off: you need sufficient building length and separate dock elevations.
L-flow (compromise for awkward sites)
Goods enter one side and exit an adjacent side, forming an L-shaped flow. This pattern suits buildings with constrained site access, irregular shapes, or where expansion options are limited to one direction. L-flow is less efficient than I-flow but more efficient than U-flow for sites where through-flow is physically impossible.
The golden rule: design for flow, not storage. Storage density matters, but not at the expense of throughput. A warehouse that stores 10,000 pallets but can only dispatch 200 per day is failing its primary function.
Zone Types and Their Space Requirements
Every warehouse needs these functional zones, each with distinct space and access requirements:
| Zone | Primary Function | Typical Space Allocation |
|---|---|---|
| Receiving | Unload, inspect, label inbound goods | 10-15% of total area |
| Marshalling | Stage goods before put-away or dispatch | 8-12% of total area |
| Storage | Pallet racking, bulk floor storage | 22-27% of total area |
| Picking | Order assembly, carton flow, bin shelving | 15-20% of total area |
| Packing | Consolidation, labelling, wrapping | 5-8% of total area |
| Dispatch | Load outbound vehicles | 10-15% of total area |
| Returns | Inspection, restocking, disposal | 3-5% of total area |
| Value-add | Kitting, labelling, light assembly | 5-10% of total area |
| Offices/Welfare | Staff facilities, management | 5-8% of total area |
Note that actual storage — the racking footprint — typically occupies only 22-27% of total warehouse floor area in UK operations. The remaining 73-78% supports circulation, marshalling, offices, and safety clearances. This ratio often surprises operators planning new facilities.
Safety-First Layout: HSE Requirements
The HSE’s warehousing guidance is not optional. Compliance is enforced through inspections and incident investigations. The definitive reference is HSG76 — Warehousing and Storage: A Guide to Health and Safety, written with the Warehousing Health and Safety Forum representing trade unions, trade associations, and employer bodies. Though parts address specialist sites (temperature-controlled, dangerous substances), the majority applies across the sector regardless of facility size.
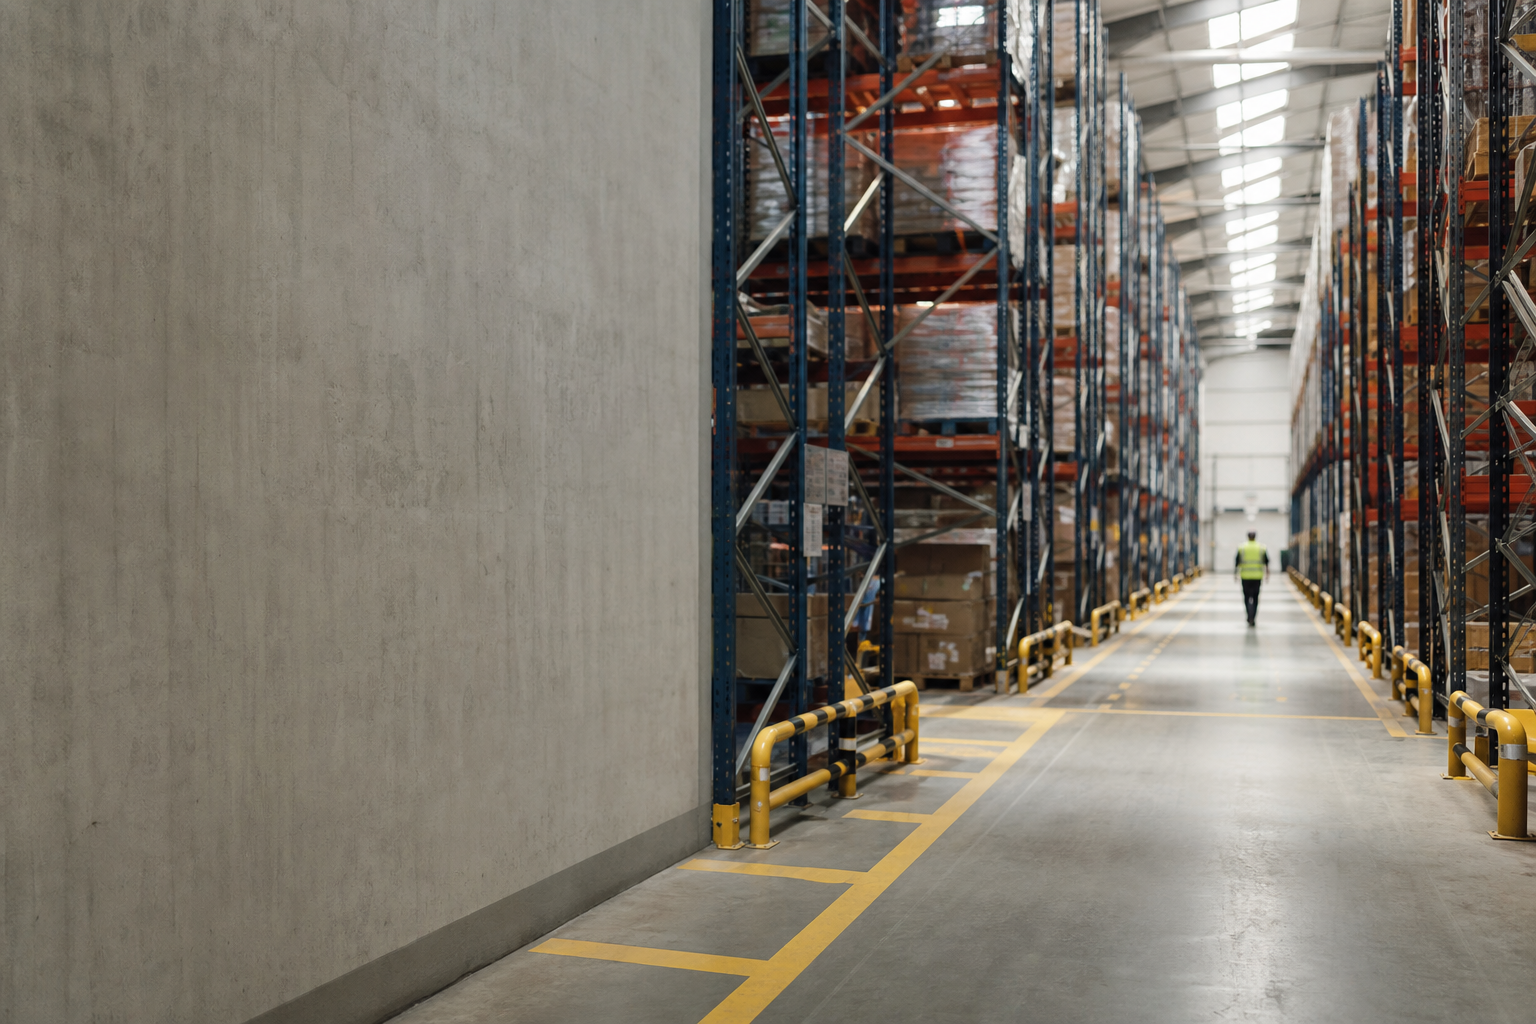
Pedestrian and Vehicle Segregation
Every workplace must be organised so that pedestrians and vehicles can circulate safely. The HSE states that where vehicles and pedestrians use the same traffic route, there should be adequate separation — ideally completely different routes, or physical barriers.
In practice, this means:
- Dedicated pedestrian walkways marked with yellow lines, ideally with physical barriers (guardrails, kerbs) separating them from vehicle routes
- Clearly marked crossing points with mirrors, signage, and stop lines for vehicles
- High-visibility clothing for all warehouse staff (EN ISO 20471 Class 2 or 3)
- Speed limits enforced through signage and floor markings (typically 5 mph for forklifts in operating areas)
- One-way vehicle systems where possible to reduce reversing manoeuvres
Traffic Route Design
Risk assessments must account for periods when vehicle and pedestrian numbers change — shift changes, office staff arrivals, visitor movements. The HSE provides a free Site Inspection — Workplace Transport Checklist that covers route design, signage, lighting, and surface conditions.
Key requirements:
- Routes must be wide enough for the largest vehicle plus clearance (minimum 1 metre on each side)
- Surfaces must be even, well-maintained, and free from obstructions
- Lighting must be adequate for safe operation (minimum 100 lux in operating areas, 200 lux at inspection points)
- Blind corners require mirrors or cameras
- Loading bays need wheel stops, dock levellers, and vehicle restraint systems
Manual Handling and Ergonomics
Manual handling causes more reportable accidents than any other single factor. Layout decisions that reduce lifting, carrying, and awkward postures directly reduce injury rates:
- Store heavy items at waist-to-knee height (the “golden zone” for picking)
- Use mechanical aids (pallet trucks, lift tables, conveyors) wherever loads exceed 25kg
- Design picking faces to minimise reach distances and bending
- Provide adjustable workstations for packing and value-add operations
Risk Assessment for Layout Changes
Any significant layout change requires a new risk assessment under the Management of Health and Safety at Work Regulations 1999. This includes:
- Adding or reconfiguring racking systems
- Changing vehicle types (e.g., introducing narrow-aisle trucks)
- Altering pedestrian routes or crossing points
- Expanding into previously unused areas
Document the assessment, consult with staff or safety representatives, and keep records available for HSE inspection.
Storage Systems and Space Optimisation
Racking Types and When to Use Each
Adjustable Pallet Racking (APR)
The universal standard in UK warehouses. Beam levels can be repositioned to accommodate different pallet heights. Typical load capacity: 1,000-1,200 kg per beam level. Best for: general-purpose storage with varied SKU profiles.
Drive-in/Drive-through Racking
High-density bulk storage where forklifts drive into the racking structure. Drive-in is LIFO (last-in, first-out); drive-through allows FIFO. Best for: homogeneous products with low SKU count, cold storage where space is at a premium. Not suitable for fast-moving or date-sensitive stock.
Push-back Racking
Pallets are stored on nested carts that slide back when new pallets are loaded. Typically 2-5 pallets deep, LIFO rotation. Offers medium density with better selectivity than drive-in. Best for: medium-velocity SKUs with predictable turnover.
Live Storage (Gravity/Pallet Flow)
Pallets move by gravity from the loading end to the picking end. FIFO stock rotation is automatic. Best for: dated products, batch-controlled goods, high-velocity SKUs where first-expiry-first-out is required.
Cantilever Racking
Arms extend from vertical columns with no front obstructions. Best for: long or irregular items — timber, steel sections, pipes, furniture. Not suitable for standard pallets.
Aisle Width Trade-offs
Aisle width is the single biggest determinant of storage density. The choice depends on the material handling equipment you use:
| Aisle Type | Width | Equipment | Density vs Wide Aisle |
|---|---|---|---|
| Wide Aisle (WA) | 3.0-4.0m | Counterbalance forklift | Baseline |
| Narrow Aisle (NA) | 2.2-2.7m | Reach trucks | +20-30% pallet positions |
| Very Narrow Aisle (VNA) | 1.5-1.8m | Turret trucks, guided systems | +40-50% pallet positions |
Wide aisle offers the lowest storage density but the highest accessibility and flexibility. Any forklift operator can use any aisle. Narrow aisle requires reach trucks but increases capacity by 20-30%. Very narrow aisle requires specialised turret trucks or wire-guided systems, often with floor-mounted guidance rails, but can increase capacity by 40-50% compared to wide aisle.
The capital cost increases with density: VNA trucks cost 2-3x more than counterbalance forklifts, and floor preparation for guided systems adds expense. However, the cost per pallet position often decreases because you store more in the same building footprint.
ABC Slotting: Put Fast-Movers Closest to Dispatch
ABC analysis applies the 80/20 rule to warehouse slotting:
- A items (top 20% of SKUs, ~80% of movements): Store closest to dispatch, at floor level or ergonomic picking height. These items should never require climbing or long travel.
- B items (next 30% of SKUs): Mid-distance from dispatch, mid-level racking positions. Acceptable to use step platforms or low-level reach.
- C items (bottom 50% of SKUs): Furthest from dispatch, higher racking levels, slower access acceptable. These are slow-movers that justify less convenient locations.
Re-slotting based on ABC analysis typically reduces average pick travel time by 25-40%. The analysis should be refreshed quarterly for fast-changing SKU profiles, annually for stable ranges.
Cube Utilisation: Think Vertically
Most warehouses underutilise vertical space. Target 85%+ cube utilisation within racking — meaning 85% of available pallet positions are filled. This requires:
- Accurate height profiling for every SKU
- Beam level adjustments to minimise wasted vertical space
- Mezzanine floors where building height allows (typically adds 40-60% floor area at 50-70% of new-build cost)
- Regular audits to identify and eliminate “honeycombing” (empty positions scattered throughout racking)
Picking Efficiency and Labour Design
Picking accounts for 50-60% of warehouse labour costs. Layout decisions directly affect pick rates. For guidance on measuring and improving pick performance, see Warehouse KPIs and Metrics.
Pick Path Optimisation
Design picking routes that minimise backtracking. Common strategies:
- S-shaped paths through picking aisles (pick both sides in one pass)
- Zone picking with handoff points (each picker works one zone, orders are consolidated downstream)
- Wave picking (multiple orders picked simultaneously in batches)
Goods-to-Person vs Person-to-Goods
Traditional warehouses send pickers to the stock. Modern automated systems bring stock to stationary pickers via conveyors, shuttles, or autonomous mobile robots. Goods-to-person systems can increase pick rates from 60-80 lines/hour to 200-400 lines/hour, but require significant capital investment and are only justified at high throughput volumes.
Technology Integration
- RF scanning: Real-time verification of picks, reduces errors by 50-70%
- Voice picking: Hands-free operation, increases pick rates by 15-25%
- Pick-to-light: Visual indicators at each location, best for high-SKU, small-item operations
- Augmented reality: Emerging technology showing pick locations through smart glasses
For a detailed ROI analysis of automation technologies, see Warehouse Automation UK: ROI Guide.
Space Planning by the Numbers
Dock-to-Warehouse Ratios
A common rule of thumb: one dock door per 10,000-15,000 sq ft of warehouse space for balanced operations. However, this varies significantly by throughput profile:
- High-velocity distribution: one door per 5,000-7,500 sq ft
- Storage-heavy operations: one door per 20,000-25,000 sq ft
- Cross-dock facilities: dock space may equal 30-40% of total area
Marshalling Area Sizing
Marshalling areas stage goods before put-away or dispatch. Undersized marshalling causes dock congestion; oversized marshalling wastes valuable floor space. Calculate based on:
- Peak hourly receipt/dispatch volume
- Average pallet footprint (1.2m x 1.0m = 1.2 sq m, plus 0.3m clearance = 1.5 sq m per pallet position)
- Dwell time (how long goods wait before moving to next stage)
Example: If you receive 40 pallets per hour at peak, with 30-minute average dwell time, you need space for 20 pallets in receiving marshalling (40 pallets/hour × 0.5 hours × 1.5 sq m = 30 sq m minimum).
Growth Headroom
Plan for 85% full = time to plan expansion. When racking utilisation exceeds 85%, operators face a choice: add shifts (labour cost), rent overflow space (double handling), or expand the facility (capital cost). Monitoring utilisation trends allows proactive planning rather than crisis response.
Key Takeaways
- Warehouse layout is a flow system design problem, not just storage placement — prioritise throughput over density
- HSE compliance requires physical pedestrian/vehicle segregation, documented risk assessments, and HSG76 adherence
- U-flow suits SME warehouses; I-flow maximises throughput for high-volume operations; L-flow fits constrained sites
- ABC slotting reduces pick travel by 25-40% by placing fast-movers in the “golden zone”
- Aisle width choices drive capacity: VNA adds 40-50% more positions than wide aisle but requires specialised equipment
- Target 85% cube utilisation within racking and plan expansion when you hit 85% full
Frequently Asked Questions
What is the ideal aisle width for my operation?
It depends on your equipment and priorities. Wide aisle (3.0-4.0m) works with any counterbalance forklift and offers maximum flexibility. Narrow aisle (2.2-2.7m) requires reach trucks but adds 20-30% capacity. Very narrow aisle (1.5-1.8m) needs turret trucks or guided systems and adds 40-50% capacity. Calculate cost per pallet position, not just upfront equipment cost.
How many dock doors do I need?
Use throughput, not floor area, as your guide. For high-velocity distribution, plan one door per 5,000-7,500 sq ft. For storage-heavy operations, one per 20,000-25,000 sq ft may suffice. Calculate based on peak hourly vehicle movements: if you receive 8 lorries per hour at peak and each takes 15 minutes to unload, you need at least 2 receiving docks (8 × 0.25 hours = 2 docks).
Can I change my warehouse layout without shutting down?
Yes, but it requires phased implementation. Start with one zone or aisle, complete the reconfiguration, then move to the next. Schedule major changes during low-volume periods (weekends, seasonal troughs). Temporary overflow storage may be needed for stock displacement during the transition. Document the new layout and update risk assessments before staff work in the reconfigured areas.
What is the minimum space I need for a returns processing area?
Plan 3-5% of total warehouse area for returns, but the critical factor is throughput capacity, not percentage. A typical returns station processes 20-40 items per hour per operator. Size the area to handle your peak daily returns volume with 2-3 days of buffer stock. Include space for inspection, restocking, disposal, and documentation.
How often should I re-slot my warehouse based on ABC analysis?
For fast-changing SKU profiles (e-commerce, seasonal goods), refresh ABC analysis quarterly. For stable ranges (industrial supplies, spare parts), annual review is sufficient. Monitor pick travel times and congestion — if pickers report increased travel or certain aisles are constantly congested, it may indicate slotting has drifted from actual demand patterns.